You are using an out of date browser. It may not display this or other websites correctly.
You should upgrade or use an alternative browser.
You should upgrade or use an alternative browser.
Growing some JBP
- Thread starter cmeg1
- Start date
cmeg1
Imperial Masterpiece
Rockwool
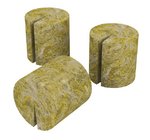
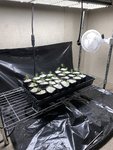
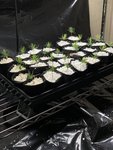
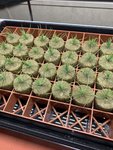
The more I think about it,I am leaning towards Grodan Macro Plugs in a Gro Smart Tray for seedling cuttings.Fits great in a 1020 tray and is suspended above water without touching it.And can also sustain in the little plugs for quite some time without overwatering.
Or square ones....the hole is too big in them unless I made an off center hole.That is why I like the round ones with the slit.
Attachments
Leo in N E Illinois
The Professor
- Messages
- 11,609
- Reaction score
- 24,259
- USDA Zone
- 5b
Caref
I first used rock will in the 1980's. I still have some on hand, I still use it occasionally for orchids. Have not bought any in over a decade, when gone, I'm not buying more. It is quite similar to fiberglass. It doesn't break down. It is fine for some plants, like basil and tomatoes. I still have fuzzy bits of Grodan rock wool sticking out of the ground in my vegetable bed, where I recycle orchid and bonsai mix. Those round plugs will be stuck in the "shin" of your trees forever. I would not use it. The small cubes are fine, but the plugs last forever, and will be an issue in the future. The small cubes last forever too, but are not a big issue.
The bark in the mix serves as food for mycorrhiza. Rock wool does not. I would keep at least a small amount of bark.
Rockwool
The more I think about it,I am leaning towards Grodan Macro Plugs in a Gro Smart Tray for seedling cuttings.Fits great in a 1020 tray and is suspended above water without touching it.And can also sustain in the little plugs for quite some time without overwatering.
Or square ones....the hole is too big in them unless I made an off center hole.That is why I like the round ones with the slit.
I first used rock will in the 1980's. I still have some on hand, I still use it occasionally for orchids. Have not bought any in over a decade, when gone, I'm not buying more. It is quite similar to fiberglass. It doesn't break down. It is fine for some plants, like basil and tomatoes. I still have fuzzy bits of Grodan rock wool sticking out of the ground in my vegetable bed, where I recycle orchid and bonsai mix. Those round plugs will be stuck in the "shin" of your trees forever. I would not use it. The small cubes are fine, but the plugs last forever, and will be an issue in the future. The small cubes last forever too, but are not a big issue.
The bark in the mix serves as food for mycorrhiza. Rock wool does not. I would keep at least a small amount of bark.
cmeg1
Imperial Masterpiece
Just about ready for cuttings
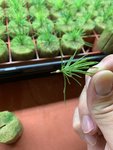
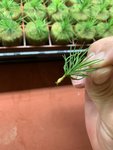
These are developing rather quickly at 16 days.The stems are starting to go red and
I’ve heard this is optimal time for cuttings.
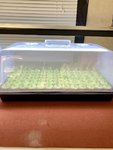
I’m thinking I may only leave 1/2” of stem since rooting in Rockwool and very stable environment in a humidity dome.
Going to Dip & Grow ,then also seal up with Clonex Gel so no embolism in the stem.It is actually weaker strength than the quick dip.Although I will dip for at least a couple minutes.Jonas at Bonsaitonight said 5 minutes!
I also learned it is best to take cuttings at end of light cycle because the plant has been photosynthesis all day and has more energy in top for cutting!
If you were to take in morning all the created energy had went downward to roots over night.
I foliar fed with Fulvic Acid and Kelp last night.
Along with Calcium and Amino Acids and other Bio Stimulants in the root drench.
I want to get these active as I can,so they are pumped up when I proceed with cuttings.Probably a couple days on many of them.
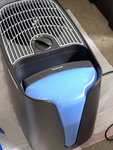
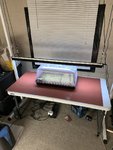
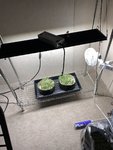
Got a nice humidifier from Honeywell.Has uv light to kill bacteria.
I put it on a timer at 1 hr on/half hour off.
Keeps it between 40-60% relative humidity.


Attachments
cmeg1
Imperial Masterpiece
Did the first few cuttings
Wish me luck I guess.I don’t see why they would not root.
Did 44 of them,still have about 75 left to do,but not quite there yet.
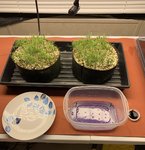
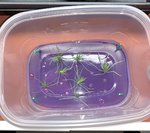
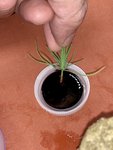
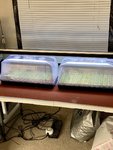
Made a nice gadget to let about 20 cuttings soak at a time in the dip&grow.I watered 2 hours before and waited till end of light cycle.
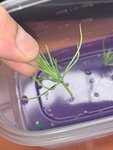
Did the quick dip for 4-5 minutes at 10X strength ,then into some Clonex Gel just to seal it up a bit before putting in the Rockwool.
Stems are only about 1/2”.
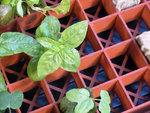
I don’t really mind the Rockwool,just as long as they root.Its more convenient really with the smart tray.
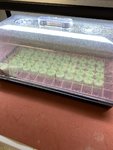
Bottom heat at 75 degrees.Over a half inch of water in bottom of tray and the Smart tray suspends the Rockwool plugs above,so they are not getting saturated all the time sitting on the bottom.
I am going to try and leave the dome closed for a weeek...unless tray needs more water.
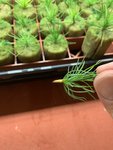
I was wondering if pulling a bottom needle from each side and tearing down the stem with a tiny shred would increase rooting.Maybe I’ll try it.
Wounding.
Attachments
-
 2E067975-709C-448C-85E4-7E74E6EA1598.jpeg251.8 KB · Views: 38
 -
 805C9560-721F-45A3-A977-C3B24A7AF871.jpeg214.4 KB · Views: 40
 -
 2CD58FE7-B542-4BA7-BD9E-B7F4887A7D9A.jpeg118 KB · Views: 37
 -
 B45B6420-A8AD-4E94-BED3-9564A07B7A9B.jpeg197.8 KB · Views: 39
 -
 989004DA-05C1-4019-BF2D-9BB39E191C8A.jpeg273.6 KB · Views: 39
 -
 8E34EBFE-51B3-493F-B064-E58A4242F83C.jpeg240.2 KB · Views: 42
 -
 C7CFEABD-4914-4796-8CAB-EDA3A86F136C.jpeg285.5 KB · Views: 38
 -
 D7682D12-5CEF-41B1-A72D-436631856A9E.jpeg225.5 KB · Views: 35
 -
 380FA9F7-3169-4F96-B0F0-F321AE3B4D6C.jpeg231.1 KB · Views: 51
Last edited:
cmeg1
Imperial Masterpiece
The Mighty One
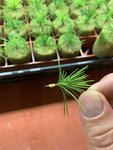
Not everyone may find this interesting,but starting from seed is great to really see the diversity and potential in the genetics.
All the times I ever grew JBP I never actually seen the elusive seedling that had straight,thick needles when they sprouted as some publications suggest to make seedling cuttings from them if possible.
This one looks pretty awesome though with needles and stem being at least 20% thicker than the vast majority of other seedlings.Not to mention being perfectly straight.
It makes me wonder if this seedling has traits that actually make it use and create it’s own food more efficiently!
I’m trying to decide if I want to make a cutting or just let it grow like normal.
Maybe I will have time to decide to see the success rate of the first batch.
I will be filling a whole other tray within a week it looks.They need to get a little bigger.


So, out of complete ignorance I was wondering, why do you grow seedlings just to make cuttings from them? What is it supposed to do for the tree rather than just letting the seedlings grow? Or am I misunderstanding the posts? Just wondering because I keep seeing you mention cuttings.
cmeg1
Imperial Masterpiece
Please see this thread by @kingsville growerSo, out of complete ignorance I was wondering, why do you grow seedlings just to make cuttings from them? What is it supposed to do for the tree rather than just letting the seedlings grow? Or am I misunderstanding the posts? Just wondering because I keep seeing you mention cuttings.
I used to wonder the same thing.
Look at Mark’s pictures too!
JBP seedling/cutting growers competition(Mark Comstock)
I'm in, I started a half pound of red and a half pound of Black on January 13. As usual I procured decent seed from Schumacher. Put seeds in a bowl and poured hot water from a coffee maker over them, let them sit over night and planted the next morning. I planted them in milled sphagnum and...
cmeg1
Imperial Masterpiece
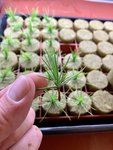
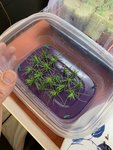
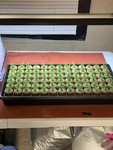
Made 122 Seedling Cuttings
Now just have to see how many make it.
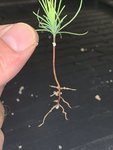
I lifted one out from last week and detected first signs of callousing.
Still have about 30 or so.Trimmed roots on about 12 of them,then decided to wait and see how cuttings do.
Now just have to see how many make it.
I lifted one out from last week and detected first signs of callousing.
Still have about 30 or so.Trimmed roots on about 12 of them,then decided to wait and see how cuttings do.
Attachments
-
 2EB27783-B752-456E-903D-FC56E848D81B.jpeg134.8 KB · Views: 37
 -
 0CBFBBAA-0F84-4402-B237-25F7C1D9D409.jpeg213.4 KB · Views: 37
 -
 0F6D8843-DE08-4DCE-B9D9-8E31D0C5AFA3.jpeg193.3 KB · Views: 36
 -
 FF415B2B-EF9C-40B3-85FD-57D17CB21EF6.jpeg181.8 KB · Views: 34
 -
 BC229333-AC5D-433E-BEC3-8109D2710520.jpeg208.4 KB · Views: 35
 -
 34B2C5FC-6345-43A3-A33B-87CAF24E452D.jpeg92.6 KB · Views: 36
 -
 990BF360-379A-4F75-AE42-068D6AD24B3A.jpeg204.1 KB · Views: 41
cmeg1
Imperial Masterpiece
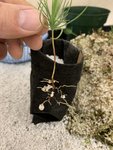
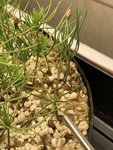
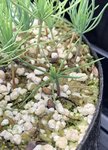
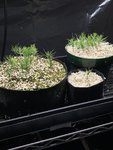
Potted up some regular seedlings.
Potted these up just in case cuttings don’t work out.
Got to get the roots vigorous first!
The 1pt. fabric pots are great till I pot them on early Spring.They will get really dense rootballs.
I actually like just plain old seedlings....I hope I get many cuttings,because I will have went through many good seedlings......Can always get another batch of seed though.Plenty of time yet.
Attachments
cmeg1
Imperial Masterpiece
Attachments
Last edited:
Do we get to vote on a name for it?Out of 145 seedlings.This one has a look all it’s own. I dubbed it THE MIGHTY ONE.View attachment 264060
cmeg1
Imperial Masterpiece
Nope,Sorry.Mighty One it is.Do we get to vote on a name for it?
cmeg1
Imperial Masterpiece
ACTUALLY.......BotanicareWell that's a bunch of
Attachments
-
 DF8957D8-ADC2-48E1-9994-8ECC3ADDB2C3.jpeg21.9 KB · Views: 9
 -
 3694058E-306A-460A-91CA-D3017F74AFA2.jpeg23.5 KB · Views: 7
 -
 57A2A604-A066-465E-BA27-ABDCB7F4B459.jpeg24 KB · Views: 7
 -
 578FA1DC-A1E4-4DA1-B618-8445703F9740.jpeg32.1 KB · Views: 9
 -
 4CEC0D3C-B865-48AC-BF76-52B12A0641B5.jpeg24.1 KB · Views: 13
Whoa, never seen a coco mat before. Very cool.
for what is the coco mat for?
cmeg1
Imperial Masterpiece
Cool! Getting roots.
12 days for the first batch.Getting some roots.Thats a relief really.
I did not water the second batch today,as they are callousing already at 6 days!
I should not of watered first batch last week,I believe a few succumbed to that.
Be interesting to see how many root from 120.The stem has died back almost entirely on several.It would be nice to see them bulge right at the base.
So happy!
I had my doubts from the first couple I looked at.
I bought an ounce of seed anyway in case I need them.


cmeg1
Imperial Masterpiece
cmeg1
Imperial Masterpiece
cmeg1
Imperial Masterpiece
Wow.....the second batch
At only 8 days, second batch is doing considerably better than first batch.Keeping track on what I did different.
I looked at 10,of which 7 were callousing very good.Hope they burst into root!
Will be making more in about a month.I will experiment with wounding very slightly,by tearing 2 or 3 needles down the length of the short stems.Unless this current batch just roots from everywhere than there will be no need really.
I do hope the big callouses explode with roots all around like Jonas’ did in his experiment with dip&grow.
I want very strong roots from the get go.
Attachments
Last edited:


