You are using an out of date browser. It may not display this or other websites correctly.
You should upgrade or use an alternative browser.
You should upgrade or use an alternative browser.
Digging a Large Trident Maple
- Thread starter BonsaiMatt
- Start date
BonsaiMatt
Shohin
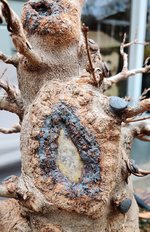
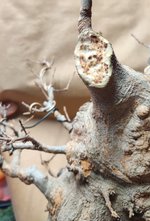
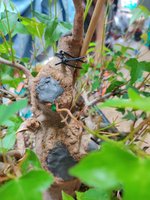
Chopped the leader and first branch. Will share some pics of the chops later today.
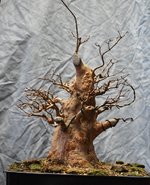
Branches are a bit messy, needs some wire, but I might wait till I wire after the first flush in spring to straighten it out. Lower right branch was wired to prevent my clumsy ass from bumping it and breaking it while carving the stump and during the upcoming spring shuffle. Another branch on the right was wired in preparation for grafting down the road. The rest of the wire is still on from last year, never had to remove it because we didn't get much growth out of it last year after the severe repotting.
Branches are a bit messy, needs some wire, but I might wait till I wire after the first flush in spring to straighten it out. Lower right branch was wired to prevent my clumsy ass from bumping it and breaking it while carving the stump and during the upcoming spring shuffle. Another branch on the right was wired in preparation for grafting down the road. The rest of the wire is still on from last year, never had to remove it because we didn't get much growth out of it last year after the severe repotting.

BonsaiMatt
Shohin
jason biggs
Chumono
this tree is coming along really nicely...
well done
well done
BonsaiMatt
Shohin
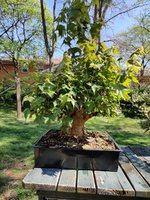
It's a bush! Just about ready for spring work.
Last year's weak growth was certainly due to the severe repotting. Seeing strong spring growth this year, but now I've got unusable internode lengths...
Any tips on reducing internode lengths? This tree puts out 2 inch internodes with regularity. No ferts so far this year, those bags are leftover from last fall, can't imagine there's much nitrogen left. Basically going to be cutting off everything that grew this year and hoping the second flush is useable.

dlayton
Mame
I am going to reply to test my knowledge and see how I do...It's a bush! Just about ready for spring work.
Last year's weak growth was certainly due to the severe repotting. Seeing strong spring growth this year, but now I've got unusable internode lengths...
Any tips on reducing internode lengths? This tree puts out 2 inch internodes with regularity. No ferts so far this year, those bags are leftover from last fall, can't imagine there's much nitrogen left. Basically going to be cutting off everything that grew this year and hoping the second flush is useable.
View attachment 430836
1. don’t worry about internode length now, focus on primary branch girth. (Not saying you’re not, or haven’t)
2. When you do your cut back after first flush, cut everything back to the first node(one pair of leaves) if it’s too long, cut it all the way back. This should induce backbudding, but not guaranteed if you go back to old wood. Then every few weeks, maintain the “basic shape” of the tree.
3. no fertilizing until after the first flush, which you haven’t done, so good!
I believe, doing this, repeatedly, will produce shorter internodes...
just my 2 cents.
BonsaiMatt
Shohin
This weekend I did some spring work on this tree: partial defoliation, cutback, wiring, and one approach graft.
I left the branches a little longer than needed, and plan to cut back farther back eventually. I left two nodes on most of the vigorous branches. Based on the strong first flush, I'm hoping that leaving two nodes will provide some short internodes to cut back to later on. We'll see how it works out.
Before work:

Removed some leaves:
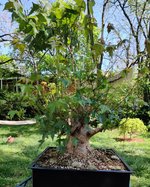
After cutback and wiring:

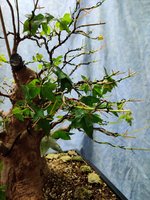

I left the branches a little longer than needed, and plan to cut back farther back eventually. I left two nodes on most of the vigorous branches. Based on the strong first flush, I'm hoping that leaving two nodes will provide some short internodes to cut back to later on. We'll see how it works out.
Before work:

Removed some leaves:

After cutback and wiring:


BonsaiMatt
Shohin
BonsaiMatt
Shohin
BonsaiMatt
Shohin
Around 2 weeks after cutback, this tree is sending out some new growth.

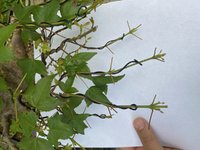
The first round of growth was too leggy, and I will eventually need to cut it all off. But I think if I had cut it off initially, the tree would have responded by sending out another round of leggy, 2-inch internodes, and I would be right back where I started.
So, I left 2 nodes of new growth on each new shoot, with the hopes that those nodes would 'soak up' all the vigor/hormones after cutback, and the growth further back on the branch would be compact and useable. You can see this illustrated in the below image, I am hoping that the growth from nodes #3 will be useable, and plan to eventually remove nodes #1 and #2. Not really sure if this is the right way to do things, but it kinda makes sense to me. Hopefully I can share some good results down the road.

BonsaiMatt
Shohin
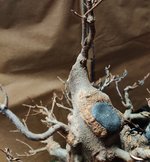
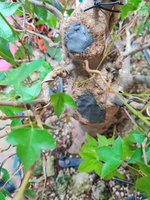
Attempted another approach graft on this tree today. Hopefully it will take and provide some needed structure in that area of the tree, and aid in healing the recent chop.
Tools:

Before the operation, the branch was already wired in place:
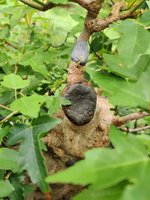

Same deal as last time, cut a groove:
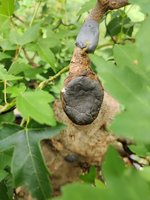
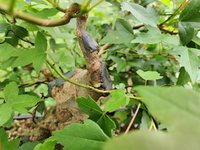
Secured with a nail:

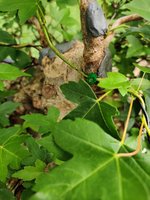
Sealed up, and fingers crossed:
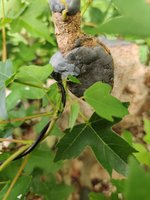

Tools:

Before the operation, the branch was already wired in place:


Same deal as last time, cut a groove:


Secured with a nail:


Sealed up, and fingers crossed:


Kullas
Shohin
This is common along very nicely. Thanks for the post.
MHBonsai
Chumono
Great documenting. What a cool tree!
BonsaiMatt
Shohin
BonsaiMatt
Shohin
BonsaiMatt
Shohin
BonsaiMatt
Shohin
Thinking about future development of this tree.
I did a virtual of some top structure that I hope to get in place over the next year. Eventually I want a broad, wide canopy around that structure, but that'll take years.
Then I messed around removing a couple branches to see how it might look. I like the middle image best. I hear a lot about asymmetrical design these days (which the third image provides), but for some reason the symmetry of the middle image works for this tree.
Would be interested to hear anyone's thoughts.
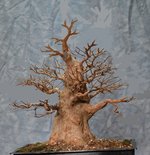
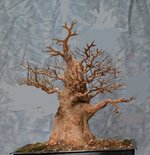


BobbyLane
Imperial Masterpiece
I know what you mean. I think the 3rd image works, but it might suit the material more if the tree was moving right lets say, in which case option 2 more gives the appearance of a firmly grounded, veteran tree, an immovable object.
Looking great!
ps This was the thread I was referring to the other day when a topic came up about using ground grown branches in a future design. that bottom right stub was grown in the field. as were a few others.
Looking great!
ps This was the thread I was referring to the other day when a topic came up about using ground grown branches in a future design. that bottom right stub was grown in the field. as were a few others.
MHBonsai
Chumono
Thinking about future development of this tree.
I did a virtual of some top structure that I hope to get in place over the next year. Eventually I want a broad, wide canopy around that structure, but that'll take years.
Then I messed around removing a couple branches to see how it might look. I like the middle image best. I hear a lot about asymmetrical design these days (which the third image provides), but for some reason the symmetry of the middle image works for this tree.
Would be interested to hear anyone's thoughts.
View attachment 470134
View attachment 470135
View attachment 470136
Agreed on the middle image. Looking at these photos I get the feeling that the tree is a little too vertical, I'd lean it more to the right if it was mine at the next potting...if it's possible? I think that will make the top section look more natural with the correction back left/right/left up top at the apex. Also I think you can lose the dead center branch coming out front - feels a little distracting to the image. Remove yellows?

Similar threads
- Replies
- 2
- Views
- 446

