Trident Renovation Project

Update on this project. A few weeks ago I had the help of some of my students to repot and check the progress on the Trident. It took some time to carefully remove the tree from the pot, explore the root ball to determine how things were progressing and plan the appropriate work during this repot.
Summary of findings.
1. the area that was addressed during the emergency repot approximately 18 months ago showed the healthiest root growth. This was the central core of the tree where the roots had all died. At the time of the emergency repot the outside edges and bottom showed soma healthy roots the core roots were dried out and dead and the major portion of the root ball was compacted with weaker roots as well.
2. The outer mat of roots on the sides and bottom were very healthy, however when the outside was trimmed off it was very apparent that the perimeter was still very compacted and showed weaker root system throughout. This area was addressed during the repot. The most compacted areas were carefully combed out with chopsticks to remove the majority of the compacted soil. This is a much older tree so the root ball was not bare rooted or washed. I chose to take a slower more cautious approach. By doing so, I hope to be able to continue some of the renovation work at earlier times in the process!
3. Clearly the tree will benefit from being placed in a grow box for several years to bring about the vigorous growth needed for the work planned. If recovery is as expected some work may even be possible this growing season.

Here are a series of photos to illustrate the comments above. The first photo shows the tree on the cart before we started. The last photo shows the condition of the tree today, three weeks after the repot. I will post some others separately to illustrate a couple of key points.View attachment 591599View attachment 591600
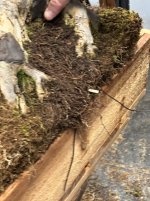
This photo shows the exterior root growth which can be deceiving. Once the edges and bottom are trimmed off then we can truly look under the hood and view the actual root ball for overall condition. This is the time to check carefully for weaker areas that may be addressed first when dealing with a revival project. Note how some sections are much darker with compacted soil even before the root mat is trimmed off.20250322_150134_resized.jpgIMG_4852.JPGimage0.jpeg
 
This photo shows the exterior root growth which can be deceiving. Once the edges and bottom are trimmed off then we can truly look under the hood and view the actual root ball for overall condition. This is the time to check carefully for weaker areas that may be addressed first when dealing with a revival project. Note how some sections are much darker with compacted soil even before the root mat is trimmed off.View attachment 591601View attachment 591607View attachment 591608
Now to the heart of the matter. Once the bottom mat is trimmed away we can truly judge the health of the main root ball. If we were to consider only the exterior show of roots one would be deceived. Check the color variation and root growth pattern in the photo below.I was very pleased to see the results of the previous emergency repot so clearly illustrated by the circle of healthy root growth in the core area excavated and cleared of dead roots on the first go around. An excellent teaching moment for those involved. To recap this area was packed with akadama (medium size particles) 20250322_150318_resized.jpg
 
Now to the heart of the matter. Once the bottom mat is trimmed away we can truly judge the health of the main root ball. If we were to consider only the exterior show of roots one would be deceived. Check the color variation and root growth pattern in the photo below.I was very pleased to see the results of the previous emergency repot so clearly illustrated by the circle of healthy root growth in the core area excavated and cleared of dead roots on the first go around. An excellent teaching moment for those involved. To recap this area was packed with akadama (medium size particles) View attachment 591609
This last photo is simply to illustrate the tie down method used for more established root balls. Note the chopstick driven into the root ball on the side, There is another one on the opposite side and the wires shown are tightened down on the chopstick to hold the root ball firmly in place. The grow box is only a bit larger on the perimeter but was built deeper to accommodate the tree for a longer period of time. This will allow more working time for the changes planned.image3.jpeg
 
This last photo is simply to illustrate the tie down method used for more established root balls. Note the chopstick driven into the root ball on the side, There is another one on the opposite side and the wires shown are tightened down on the chopstick to hold the root ball firmly in place. The grow box is only a bit larger on the perimeter but was built deeper to accommodate the tree for a longer period of time. This will allow more working time for the changes planned.View attachment 591611
 
Now that the tree is beginning recovery three weeks later. By my estimation less than 20% of the original compacted remains at this point
and it is dispersed throughout. Bits here and there because I chose to not bare root and wash the roots. I prefer a staged approach with
older mature specimens.
IMG_4201.jpeg
 
Last edited:
Back
Top Bottom