Acer buergerianum A progression

parhamr

Omono
Messages
1,782
Reaction score
6,332
Location
Portland, OR
USDA Zone
8
I’m working on an upright Trident Maple. It’s one of many trees where I’m attempting a fairly conventional and traditional aesthetic to build some of my skills. I’ll update this thread over time with progress.

I got the tree in 2014 as a $14 sapling with a pencil-thin trunk in a 4" pot. I moved it into a 14" wide mica pot. This was before I joined BSOP and had access to better material.

I’m growing it out and trying to produce taper and girth by letting the tree grow 6–8 feet tall each season. I’ve been trying to keep the lower, inner branches viable and ready for refinement through careful pruning

Here’s the earliest photo I have, from April 2015:
2374F2CD-7EBA-4F11-B14F-3865D343E4D3.jpeg

December 2015:
869DDFB2-7371-439E-9BA4-A02AFAA29551.jpeg

April 2017: (moved into a 21" square grow box of 3.5" depth)
B63CA330-DFD0-46B8-8F80-A315E1205EBA.jpeg

November 2018: (it’s the tallest tree, red colored leaves)
781B87DE-C45D-4126-B888-62151FD61861.jpeg

March 2019: at a BSOP repotting demo (the box was entirely filled with roots!)
1B6D7BF7-55F9-460A-9B50-D84E451550FE.jpeg

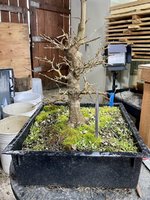
Now… (in a 15" Anderson flat)
E702A67C-08CB-460C-A8FD-12DA4002457B.jpeg

The trunk is thickening nicely:
91848382-4CD0-41DA-A542-0622DF493092.jpeg

The 2017 chop site is fully closed with new tissue:
90083FEB-E5B3-4EF7-BB0D-B45F08A7FC73.jpeg

This year’s leader is thick and the stub from the latest trunk chop is ready to be trimmed flush this winter:
DE0BE6C9-228E-4AED-A9D2-FD64808820BA.jpeg

So that’s where I’m at right now. This is a work in progress and I’m in it for the journey. In upcoming years I might end up doing some grafts or layer the tree to improve the nebari.
 
Last edited:
That thing is bulking up nicely for you! Looks like good work so far, and real promise in the coming years.
 
I’m working on an upright Trident Maple. It’s one of many trees where I’m attempting a fairly conventional and traditional aesthetic to build some of my skills. I’ll update this thread over time with progress.

I got the tree in 2014 as a $14 sapling with a pencil-thin trunk in a 4" pot. I moved it into a 14" wide mica pot. This was before I joined BSOP and had access to better material.

I’m growing it out and trying to produce taper and girth by letting the tree grow 6–8 feet tall each season. I’ve been trying to keep the lower, inner branches viable and ready for refinement through careful pruning

Here’s the earliest photo I have, from April 2015:
View attachment 264547

December 2015:
View attachment 264538

April 2017: (moved into a 21" square grow box of 3.5" depth)
View attachment 264545

November 2018: (it’s the tallest tree, red colored leaves)
View attachment 264544

March 2019: at a BSOP repotting demo (the box was entirely filled with roots!)
View attachment 264543

Now… (in a 15" Anderson flat)
View attachment 264541

The trunk is thickening nicely:
View attachment 264542

The 2017 chop site is fully closed with new tissue:
View attachment 264539

This year’s leader is thick and the stub from the latest trunk chop is ready to be trimmed flush this winter:
View attachment 264540

So that’s where I’m at right now. This is a work in progress and I’m in it for the journey. In upcoming years I might end up doing some grafts or layer the tree to improve the nebari.
When you cut flush on a trident where exactly would you make the cut?
The red or yellow line? Or somewhere else? Do you make it convex or concave? Perfectly flat?
Thank you!
BEEAD8DE-8A68-42CC-A293-E318A4D0EBA1.jpeg
 
When you cut flush on a trident where exactly would you make the cut?
The red or yellow line? Or somewhere else? Do you make it convex or concave? Perfectly flat?
Thank you!
View attachment 264584
I cut at the red line because that’s where the actual collar is and where the tissue compartmentalization has ended. I use a fine saw and cut flat. Then I fine tune it a touch with a sharp blade and cover it with liquid cut paste.
 
So... what does it look like now? The reason I ask is based upon at March 2019 picture, the trunk has fattened, but there’s no taper to the trunk.
What’s the plan for the future?
 
So... what does it look like now? The reason I ask is based upon at March 2019 picture, the trunk has fattened, but there’s no taper to the trunk.
What’s the plan for the future?
See photo six for how it looks today.

Yes, there’s not yet a lot of visible taper. From the basal flare to the lower trunk and then to the upper trunk it definitely decreases in circumference, but I will continue development growth for probably another five years to make some significant taper. The lowest few branches will be instrumental for this.

I’m envisioning a final height somewhere around 28 inches tall. The branches will continue their current pattern—outward and upward in a naturalistic fashion. I plan for a rounded apex and a proud and dignified form. The branches—and gaps between them—will be gently asymmetrical.

It’s going to be fairly middle of the road, but a respectable show of skill and development. I doubt this will look as natural as what Walter Pall does, but I feel confident I can reproduce some of the work of Dennis Vojtilla.
 
In addition to letting the lower branches grow large for trunk thickening, I’ll be correcting some of the foliage distribution and branch placement through grafting. Last night I did my first ever thread graft.

The middle section of the tree is a bit sparse, especially on the right and back sides from this perspective. You can also see the upper trunk region almost has reverse taper, which is partially from the trunk chops and partially from the quantity of branches up there.
02991AD7-97D3-46C9-922C-00501D48ECCD.jpeg

So I drilled a hole in a middle section of the trunk where there wasn’t enough branching.
FFE100C3-8E5D-462A-98DC-C919705918B6.jpeg

I picked a branch that would reach this spot, protected its buds with a wrap of parafilm, and then gave it some loose copper wire to hold and support the bend.
95A84F4B-4CA5-4503-8E4B-EA11D3D1F1F3.jpeg

The buds had already started swelling on this tree, due to the mild winter, so the wrap and a large hole (1/4" if I remember correctly) were required.
D6389D35-E328-4F11-BA26-BB818B53D81D.jpeg

With the scion approaching its desired position I unwrapped the film and adjusted the wire.
1EB5CE9C-E733-45F6-8EB4-49F81D41DA16.jpeg

Here’s how big the hole had to be for the safety of the buds. The tree will easily close up the wound.
635E525C-8244-4ADB-95DC-AF0C388541E0.jpeg

I finished up this work by gently tapping the tip of a chopstick into the back side of the hole and then I wrapped the entire wounded area with parafilm to prevent the wound from drying out.
120F1184-1AC4-4C2C-A48C-6DD11045375A.jpeg

I was tempted to make two more grafts but I think I’ll play it safe to wait and see before applying whatever I may learn to the next round of grafts.
 
In addition to letting the lower branches grow large for trunk thickening, I’ll be correcting some of the foliage distribution and branch placement through grafting. Last night I did my first ever thread graft.

The middle section of the tree is a bit sparse, especially on the right and back sides from this perspective. You can also see the upper trunk region almost has reverse taper, which is partially from the trunk chops and partially from the quantity of branches up there.
View attachment 282709

So I drilled a hole in a middle section of the trunk where there wasn’t enough branching.
View attachment 282710

I picked a branch that would reach this spot, protected its buds with a wrap of parafilm, and then gave it some loose copper wire to hold and support the bend.
View attachment 282711

The buds had already started swelling on this tree, due to the mild winter, so the wrap and a large hole (1/4" if I remember correctly) were required.
View attachment 282712

With the scion approaching its desired position I unwrapped the film and adjusted the wire.
View attachment 282713

Here’s how big the hole had to be for the safety of the buds. The tree will easily close up the wound.
View attachment 282714

I finished up this work by gently tapping the tip of a chopstick into the back side of the hole and then I wrapped the entire wounded area with parafilm to prevent the wound from drying out.
View attachment 282715i

I was tempted to make two more grafts but I think I’ll play it safe to wait and see before applying whatever I may learn to the next round of grafts.
If I might make a suggestion. on the exit hole I feel it is advisable to secure the thread graft up against the upper part of the hole for improved healing. The method I use is to lodge wooden toothpicks in the space just below the thread graft. I cut them short and press in for a firm positioning. Then I use cut paste to seal the exit area from drying! I advise against liquid sealants as they interfere with the cambium bonding in my experience!
I prefer the double pointed wooden tooth picks, inserting the point first and snapping off at an appropriate point, then carefully pressing in just below the entrance level. This leaves a solid surface for the tree to form new bark over top rather than a vacant space.
 
@River's Edge thanks Frank! I was hoping for some inputs from folks who have done this. I’ll tweak it.
Here is a similar project. Lion Head maple pre-wired for thread graft! I also like to consider the angle of entry and exit when drilling. Prefer to drill from the top down if that makes sense with a smaller hole first. Then clean the top edge with a knife! The bottom is usually a bit larger diameter and I start from the bottom with the smaller hole as a guide. If one takes the time to position the buds carefully near the exit, then cut back for node length control is easier down the road. Also the closer the buds are to the healing area seems to help with a faster union. I use a thicker piece of wire to carefully clean debris out of the hole before threading! Wool or jute on the wire seems to catch debris easily.
One other consideration can be to combine the entry hole on the edge of a scar to promote faster healing by leaving the thread graft in place longer. This year I am experimenting with leaving the back side of a thread graft in place and reversing the flow to provide a branch at both ends of the graft. Will use a tourniquet to reduce flow and encourage reversal in the branch. I have heard it works but have not seen it for myself. Similar to the staged removal of an approach graft to ensure stronger bond before disconnection of the donor plant.
IMG_9555.jpg
 
Today I took a look and found the parafilm had split and was falling off. The wound has closed but the potential new branch seems iffy. It appears to have dead cambium right near the exit, its leaves are lighter in color than the rest of the tree, and some of its buds died. I’ll keep an eye on it but let it go for the rest of the season.
D5369FC5-C620-4079-8D48-E98E645867FB.jpeg
 
I think the graft took!! Most of its buds remain viable and they’re actually swelling right now along with the rest of the plant.
339B4DF7-CCD6-4B52-9E77-F59DAD844000.jpeg

Here it is in poor lighting after 3.5 hours of root work (this is the backside). The nebari is doing great. I removed a bunch of the coarse roots and reduced some of the main surface roots to control the rate of swelling.

The trunk is 2.5" diameter just above the flare of the roots.
 

Attachments

  • 6A210315-BCDC-4181-BC03-9B0770659CC9.jpeg
    6A210315-BCDC-4181-BC03-9B0770659CC9.jpeg
    337.6 KB · Views: 135
Last edited:
The way I learned it, you build the foundation first. You dont build fine branches and then taper afterwards somehow
I’ve been trying to keep the lower, inner branches viable and ready for refinement through careful pruning
Its not a conifer, why are you bending over backwards for this? Those branches could go a long way to build much needed taper.
I dont know, I must be missing something here.
 
Taper is built primarily through successive cutback to new leaders throughout the development process. One method described in early literature was to cut back to 3 inches, grow out until the leader is 1/3 the size of the lower portion, cut leader back to 2 inches above previous cut and grow out until leader is 1/3 the thickness of the next lower portion. repeat process.
Allowing branches to run will thicken lower portions but also leave behind larger scars to heal. By managing their growth Reid will have live portion to work with to develop lower branching later without large scars to deal with. As in having to remove them completely. There is nothing wrong with combining techniques and learning from the experience. With maples if one can develop without large scars to heal that is an advantage for the end result.
The root work just completed will improve flare and that alone will add to the aesthetic overall.
An alternative is to let lots of smaller branches run lower down but remove them in favour of others before the size creates larger scars to deal with! The lower portion looks pretty hedgy during this process but it can get results as well.
Keep enjoying the journey Reid. And if you have spare time and want to practice, I have 44 trident 6 year old in Anderson flats to repot this spring.
 
The way I learned it, you build the foundation first. You dont build fine branches and then taper afterwards somehow

Its not a conifer, why are you bending over backwards for this? Those branches could go a long way to build much needed taper.
I dont know, I must be missing something here.
Truth. I say let those babies go and focus your pruning on the top branches for now. They are going to quickly get (further) out of proportion otherwise. But also, great job so far!
I think you are missing some things, but I get it. Part of me says your feedback doesn’t feel in good faith or appear very constructive, but I’ll pretend it’s well intentioned and like we have an opportunity for understanding here. From what I read your statements are like…
  • You’re doing this differently than I would do; why are you doing it wrong?
  • You’re not following this exact method; why don’t you do it this way?
  • I have a different idea or understanding; why are you not using my methods, which are right?
Those aren’t really interesting or inviting opportunities for discussion. I know I’ve really reduced what you’re saying.

I can offer this, though: most of my photos are from after doing work and it wasn’t until the end of 2019 that I had the space to afford to let this tree fully extend. You can see in the past 2–3 years of photos I am allowing the lower branches to extend more and that’s the tactic I’m using going forward. I wholly agree those lower branches could be doing more. This tree needs up to 25 square feet of ground space if the lower branches are to fully run free. My total growing spaces have been…
  1. 200 sqft, 2012–2014
  2. 400 sqft, 2015
  3. 500 sqft, 2016–2018
  4. 900 sqft, 2018–2019
  5. 1200 sqft, 2020–
Does that provide some helpful context? I live in the city and I generally let the conifers get first claim to spots having full sun. Here’s most of my yard in the middle of winter: (facing nearly exactly south… this is a corner lot and the right side is the legal “front” of the property)

IMG_1684.jpeg

(To be clear: this isn’t an invitation to “help” me find a way to maximize this space or to change my approach to something “better”)

Y’all aren’t the first to have questions like this and I suspect if I took some more “before” photos that might answer some things I’m not showing in photos.

Most fundamentally, however, I’m using a proven strategy: this (methodical, incremental development transitioning toward refinement) is how Dennis Vojtilla has grown his US National award winning deciduous trees for more than 20 years. His outcomes are almost perfectly free of scars and he has had very few losses from disease or poorly controlled growths. If you’re worried that I’m doing this alone and mistakenly mixing up orthodoxies for “how to bonsai” then I appreciate your concerns, but please know I have regular contact with and continually am learning from some extremely skilled folks.

Overall, I’m in this for the journey and not fixated on the destination. “Doing bonsai” as the biggest tree in the absolute shortest period of time just isn’t my interest. I’m working on sustainable, incremental improvements.

Keep enjoying the journey Reid. And if you have spare time and want to practice, I have 44 trident 6 year old in Anderson flats to repot this spring.
Thanks, Frank! Daaaaang that’s a lot. How much growing space do you have?

You’re right on with the flare and the root work. I wish I had taken photos of it but the flare is a wonderful horn shape and approaching 6 inches in diameter.
 
Last edited:
I think you are missing some things, but I get it. Part of me says your feedback doesn’t feel in good faith or appear very constructive, but I’ll pretend it’s well intentioned and like we have an opportunity for understanding here. From what I read your statements are like…
  • You’re doing this differently than I would do; why are you doing it wrong?
  • You’re not following this exact method; why don’t you do it this way?
  • I have a different idea or understanding; why are you not using my methods, which are right?
Those aren’t really interesting or inviting opportunities for discussion. I know I’ve really reduced what you’re saying.

I can offer this, though: most of my photos are from after doing work and it wasn’t until the end of 2019 that I had the space to afford to let this tree fully extend. You can see in the past 2–3 years of photos I am allowing the lower branches to extend more and that’s the tactic I’m using going forward. This tree needs up to 25 square feet of ground space if the lower branches are to fully run free. My total growing spaces have been…
  1. 200 sqft, 2012–2014
  2. 400 sqft, 2015
  3. 500 sqft, 2016–2018
  4. 900 sqft, 2018–2019
  5. 1200 sqft, 2020–
Does that provide some helpful context? I live in the city and I generally let the conifers get first claim to spots having full sun. Here’s most of my yard in the middle of winter: (facing nearly exactly south)

View attachment 361395

(To be clear: this isn’t an invitation to “help” me find a way to maximize this space or to change my approach to something “better”)

Y’all aren’t the first to have questions like this and I suspect if I took some more “before” photos that might answer some things I’m not showing in photos.

Most fundamentally, however, I’m using a proven strategy: this (methodical, incremental development transitioning toward refinement) is how Dennis Vojtilla has grown his US National award winning deciduous trees for 20 years. His outcomes are almost perfectly free of scars and he has had very few losses from disease or poorly controlled growths. If you’re worried that I’m doing this alone and mistakenly mixing up orthodoxies for “how to bonsai” then I appreciate your concerns, but please know I have regular contact with and continually am learning from some extremely skilled folks.

Overall, I’m in this for the journey and not fixated on the destination. “Doing bonsai” as the biggest tree in the absolute shortest period of time just isn’t my interest. I’m working on sustainable, incremental improvements.


Thanks, Frank! Daaaaang that’s a lot. How much growing space do you have?

You’re right on with the flare and the root work. I wish I had taken photos of it but the flare is a wonderful horn shape and approaching 6 inches in diameter.
I am currently using an enclosed area of 80 feet by 30 feet for display and grow out. As well the property is 3.5 acres giving me additional space outside the enclosed nursery space for larger trees in grow out boxes and Anderson flats on the ground. The acreage is now fenced and gated. This removed the deer and elk from browsing. My limitations now are time and reach of watering systems! Primary limitation is maintaining proper development for trees underway. The easy part was the beginning with seeds and cuttings 11 years ago when I started the nursery portion of my Bonsai journey! The focus has switched to development and refinement of nursery stock and now increased collection and adaptation of Yamadori. As I continue to age the focus will likely change again to smaller trees, less collecting and more styling and refinement. I no longer even stop to consider two person trees, that may be partly the result of major back surgery last year.
I have a small greenhouse that aids in special projects ( 10 by 12 ) and a Bonsai workshop for classes and private work. ( 30 by 20 ).
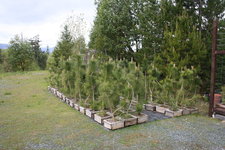
The picture below shows the method I use for outside the bonsai enclosure! Grow boxes spaced on plastic sheeting laid on the ground. Shift the boxes further apart when extra space is required as they grow. Repot to larger containers as required, then shift the process down to smaller container as I move the trees into refinement. The picture shows 14 rows of JBP , 6 boxes per row set for the growing season. Takes up an area of 10 ft by 30 ft roughly. Two wheel dolly and garden wagons come in handy!
 

Attachments

  • IMG_1080.jpeg
    IMG_1080.jpeg
    289.8 KB · Views: 195
Eighteen months ago, you said:

I will continue development growth for probably another five years to make some significant taper. The lowest few branches will be instrumental for this.

Now, to be quite honest I think that you probably meet or exceed my level of expertise, but that does not disqualify me from offering input I hope. The input that I have is that with tridents and most broadleaf species, if you prune all of your branches the same as you seem to be doing, then you will wind up losing traditionally-accepted proportions between your first branches and those above. Case in point, I can clearly watch this happening in the time between post #12 and post #13 above.

Among your alternative interpretations, my point falls most accurately within "You’re not following this exact method; why don’t you do it this way?" You have implied that the question lacks good faith or is not constructive. I think that the opposite is true. When someone describes orthodoxy and asks why you are doing things differently, then that person is being patently open to the possibility that there is an answer to the "why?". That is where there is an "opportunity for understanding" here.

So here is one bit of information we didn't have, and it really is informative:

I can offer this, though: most of my photos are from after doing work and it wasn’t until the end of 2019 that I had the space to afford to let this tree fully extend.

Makes total sense. I probably would have done the same thing.

And here is something else that I had not considered:

Most fundamentally, however, I’m using a proven strategy: this (methodical, incremental development transitioning toward refinement) is how Dennis Vojtilla has grown his US National award winning deciduous trees for more than 20 years.

Never heard of him. I will have to read up on it. A quick search tells me that Vojtilla advocates repeated hard pruning of branches. Although, in a post of yours on imgur.com (first page result on Google for "Dennis Vojtilla bonsai" woohoo!) you described the method as including regular removal of upper branching in favor of lower branching. Will you be doing that on this trident? Had I been more verbose in my first response, that is something I would have suggested myself.

I stand by my original comment, this is a really nice start to a great tree. I have been "watching" the thread for a while, and it will be interested to see where the tree goes in the future.
 
@luvinthemountains those are helpful clarifications! Thanks so much. I appreciate the time you’ve put into this. I’m sorry to have put words in your mouth.

I’m busy at work and can’t promise a timely response. For now and in general I’ll offer: “The Dennis Vojtilla Method” is hard-ish to describe and the Bonsai Mirai Symmetry podcasts (there are two episodes with him!) are the best explainers. While it is functionally true that his prunes are “hard” (back to two nodes) and “repeated” (multiple times in a growing season) there are just a lot of additional clarifying things to add.

I wish I could write more but I’ve gotta drop this here to get to an important design review. Cheers, man.
 
Back
Top Bottom