Zelkova serrata (2013-...)

Messages
1,654
Reaction score
2,539
Location
Belgium
Not having a little broom in my collection is not an option and what is better than starting a zelkova for that matter. In 2013 i found a zelkova stick in the local bonsai nursery. I looked for straight trunk this time and this was as straight as i found that time.
April 2013 Repotted and first adjustment of the roots. Not perfect but having lots of airlayers i might try this one the "normal" way.
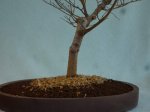
201304.JPG
May 2013 I went ahead and chopped the poor thing. Little v-cut.
201305.JPG
January 2015 After 2 growing seasons there are a few branches, they are not perfect for a classical broom so i went for a more free interpretation.
201501.JPG
June 2015 Second or third flush of growth (right leaves are darker), that branch needed to thicken a bit.
201506.JPG
June 2015 after cutback
201506 (2).JPG
April 2017
201704.JPG
May 2017 Letting the branches extend to close the wound and creating bigger branches. Leaving the top leaves allows to extend and cleaning the basal leaves allows light for the small branches in the interior.

201705.JPG
 
Nice work. I don’t have a photo of my Zelkova....it’s well buried under snow and needs to stay that way for awhile.

I took my primary branching, the branches immediately off the trunk, down to only three. Staggered setting. Probably not a broom like you’re talking about. I wanted to avoid that large bulge that can happen at the starting point of all the branches. I let those three grow and thicken. Then chopped back hard to a bud on each and basically started over. Let that level thicken. When I started I began with a v-cut like yours....I just selected branches growing at different levels....what I called staggered setting....just because that’s what I wanted. I know...a photo would be better....I can’t do that now though.

You have a nice structure starting on your tree. Looks to me like you’re doing the right things. I look forward to seeing your steps and stages. Keep updating this post at seasonal intervals if you can. I’m always learning.

Mine seems to grow well....really out of control well if not attended to regularly. Lots of sun....but filtered sun during the middle/peak month of summer. How about your tree? .....in your Belgium climate....which is probably a lot different than my climate.
 
It are strong trees and don't need protection here in full sun. But full sun is relative here... Looking forward to your tree. There are lots of different ways to build zelkova, no right or wrong i think.
 
View attachment 173055
May 2017 Letting the branches extend to close the wound and creating bigger branches. Leaving the top leaves allows to extend and cleaning the basal leaves allows light for the small branches in the interior.

View attachment 173056[/QUOTE]
What do you have at the base of the tree in the last photo ??
 
View attachment 173055
May 2017 Letting the branches extend to close the wound and creating bigger branches. Leaving the top leaves allows to extend and cleaning the basal leaves allows light for the small branches in the interior.

View attachment 173056
What do you have at the base of the tree in the last photo ??[/QUOTE]
You should carefully carve out the “bumps” on the trunk. Zelkova brooms should have straight smooth trunks.

Don’t try to put many “wiggles” in the branches. Yes, they should have taper, but you don’t want sharp angle changes. Here’s mine as an example:

166767F6-CC94-4A68-AC57-3CEE1CA51829.jpeg

Something else to avoid is the dreaded bulge at the chop point. To help prevent this, drill out the hardwood center of the chop. Fill with putty cut paste to prevent rot. Bind the top of the trunk and bases of the branches with cotton string to prevent an outward bulge. The cut paste should be soft, so the branches can bulge inwards. You may find you want to make some V cuts between the branches. Having the core drilled out makes this MUCH easier!
 
View attachment 173055
May 2017 Letting the branches extend to close the wound and creating bigger branches. Leaving the top leaves allows to extend and cleaning the basal leaves allows light for the small branches in the interior.

View attachment 173056
What do you have at the base of the tree in the last photo ??[/QUOTE]
Sphagnum and fertilizer.
 
@Adair M the branches emurged imperfect so I opted for a non traditional broom. You are right I could have done a better job. It was my first attempt and it isn't as easy as I thought. I'll try to make a better one soon. Thanks for the carving bumps hint.
 
@Adair M the branches emurged imperfect so I opted for a non traditional broom. You are right I could have done a better job. It was my first attempt and it isn't as easy as I thought. I'll try to make a better one soon. Thanks for the carving bumps hint.
Dirk, they never come out at the right angle!!! Lol!! Then it would be too easy!

As soon as they get to be a couple inches long, but the shoots are still soft, that’s when you do something like wrap string around the chop, or even, use a pipe clamp to direct the branches up instead of out.
 
Since they started a bit lower than the chop and I didn't wanted to risk damaging the new growth I waited a bit too long. Lesson learned.
 
Dirk, they never come out at the right angle!!! Lol!! Then it would be too easy!

As soon as they get to be a couple inches long, but the shoots are still soft, that’s when you do something like wrap string around the chop, or even, use a pipe clamp to direct the branches up instead of out.

Hi Adair (and Dirk)
Great tree Adair, just wanted some guidance on how big to grow the girth of the trunk before doing the chop. So if the chop is 1/3 the finished height,how does the girth work in relation.
Thanks for the help
Charles
 
Hi Adair (and Dirk)
Great tree Adair, just wanted some guidance on how big to grow the girth of the trunk before doing the chop. So if the chop is 1/3 the finished height,how does the girth work in relation.
Thanks for the help
Charles
My branches start a little higher than 1/3.

Girth of trunk? I think it depends on how many branches start at the chop. Thick trunk should have lots of branches.
 
To help prevent this, drill out the hardwood center of the chop
How much sir? Half the diameter? More? Less?
I've got an elm I'm collecting in spring and plan turning into a broom. A couple actually.
 
Drill out as much as you can around the perimeter, making sure not to get into the cambium from the inside.

You might want to see if you can get one or two of the shaped drill bits used for cutting little divots so that flat topped screw heads will be flush once. Screwed into a piece of wood.

You might want to go down 3/4 inch. Depends on the caliper of the tree.

This technique is the alternative to making a V cut chop instead of a straight chop. The problem with the V cut is you don’t know where your shoots are going to pop.

If you cut it straight across, but have drilled out the center, you can more easily cut Vs between the new branches after they pop.
 
Hey @Adair M It would be awesome if you would put a broom tutorial up in the resources. I have noticed you have been explaining it here and on FB so it would be super cool to have it preserved.
 
Hey @Adair M It would be awesome if you would put a broom tutorial up in the resources. I have noticed you have been explaining it here and on FB so it would be super cool to have it preserved.
I’ll see what I can do. I’m going to be at Boon’s all next week, so I’m going to be busy!
 
Back
Top Bottom