dirk hoorelbeke
Omono
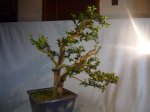
First of all, this is not a standard repotting job and i'm not at all an expert. I "forgot" to repot this one for 3 years (or something like that). The tree started to lose some vigor and i found the tree was a bit rootbound.

After taking the tree out of the pot, preparing the pot is the first thing to do.

Drainage layer bims (pumice) and akadama

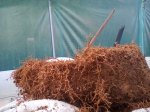
Being compacted and boxwood having fibrous root and knowing what was under the soil, i took out the handsaw. Sawing the sides first.

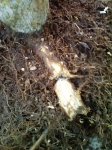
Next finding the nebari, that way you know how deep it is in the pot. For trees in development i place most of the nebari 0,5 or 1 inch beneath the soilline. This way more roots will develop in that place. Boxwood tend to have roots growing up when the conditions stay right higher. So i had to dig a bit.

Sawing a SMALL slice of the bottom.

Having two hands i had to improvise a bit so i could work on the bottom of the rootball.

Worked the left side of the bottom.

The stick points at the wood at the base of the trunk. It is time to stop digging.

Remove the soil (akadama and bims) from the outer ring of the rootbase. Look carefully and feel where the big roots are. Note that a big part of the akadama is still intact. The tree never went in a greenhouse during winter and regular frost is common here.

After that it was time to position the tree in the pot and working down the new akadama and bims between the roots. After watering the tree went in the greenhouse to give the tree a jumpstart.

After taking the tree out of the pot, preparing the pot is the first thing to do.

Drainage layer bims (pumice) and akadama

Being compacted and boxwood having fibrous root and knowing what was under the soil, i took out the handsaw. Sawing the sides first.

Next finding the nebari, that way you know how deep it is in the pot. For trees in development i place most of the nebari 0,5 or 1 inch beneath the soilline. This way more roots will develop in that place. Boxwood tend to have roots growing up when the conditions stay right higher. So i had to dig a bit.

Sawing a SMALL slice of the bottom.

Having two hands i had to improvise a bit so i could work on the bottom of the rootball.

Worked the left side of the bottom.

The stick points at the wood at the base of the trunk. It is time to stop digging.

Remove the soil (akadama and bims) from the outer ring of the rootbase. Look carefully and feel where the big roots are. Note that a big part of the akadama is still intact. The tree never went in a greenhouse during winter and regular frost is common here.

After that it was time to position the tree in the pot and working down the new akadama and bims between the roots. After watering the tree went in the greenhouse to give the tree a jumpstart.


