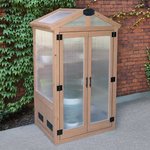
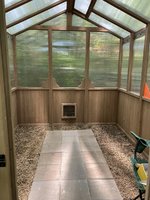
My greenhouse is coming!

WNC Bonsai

Masterpiece
Messages
2,119
Reaction score
2,514
Location
Western NC
USDA Zone
7b
For a couple of years now I have been considering buying a greenhouse. The regular mid-winter warm spells followed by returns to freezing conditions, along with the roller coaster temperature swings has convinced me that I either have to have a way to get my trees through the winter without doing the bonsai shuffle or leave the hobby. Then I saw the Yardistry greenhouses being sold widely in the US through Costco. After watching several YouTube videos on the construction process, yes these come as a kit, I decided on the 8’ x 9’ 8 3/4” version. Then I had to wait a couple of months for them to come back in stock. Last night I checked the Costco website and there they were, so I hit the buy button and it is scheduled for delivery on Thursday. These seem to be a well made Canadian product, comprising cedar framing and double walled polycarbonate glazing panels. The wood is all precut, predrilled, so all you have to do is screw it together, slide in the glazing, and mate up the walls on a 4”x4” or concrete base and move in your trees! Of course the devil is in the details, so I expect a few kinks along the way, but I have built much more complex stuff then this, including building a carport from scratch. I’ll continue this thread as I go through the process of building this sucker. Below are a couple of links first to the Costco page as well as the Yardistry video on putting one together. Right now I need to head to Lowes for several 4”x4”s and start preparing the base.

IMG_5908.jpeg


Last edited:
And it arrived Thursday in 3 huge 8.5’ long boxes. The Costco guys were kind enough to back down my driveway and stack the boxes in my garage which was a great relief. So far I have sorted and inventoried all the parts, counted all the screws (over 1000 of them), and checked all the hardware. Next I need to prepare the 4”x4” base and then start building the walls. I don’t plan to rush things, so if I can get it up and ready in a week or two that is fine with me. No freezes expected in that time frame and just about all the trees that needed repotting are done. In the meantime the garage is filled with the aroma of Canadian cedar, should make the mice happy!

IMG_0066.jpeg
 
That looks really good and solid, I will be interested in the bigger version when I moved. The prices are really good too, Thanks for sharing and please let us know how it is when you're finish putting it together and how long it took.
 
I have one of these. They're quite a bit cheaper in store... $1349.

The mini-greenhouse that's $600 online is also available in store on clearance for $299.97.
 

Attachments

  • imageService-2024-01-03T220648.377.jpg
    imageService-2024-01-03T220648.377.jpg
    33 KB · Views: 41
How do you like the quality so far?

Well... it's no Hartley but the Hartley would also cost an extra two zeros. ;)

It's pretty solid. The build was pain the butt but once you got the hang of it, it was pretty intuitive. Just took a while.
 
Congrats! I hope it serves you and your trees very well! Strong work
 
Mighty fine! ……And, I hope you don’t outgrow the space to quickly.
 
What @Tieball said... but it does help to keep the urge to strike every single cutting down... Looks nice, good luck with the build!
 
I’ll update you as the build progresses. The wood members seem pretty strong with very little warpage but cedar is not a heavy wood which is a good thing when it comes to moving the walls around. This one is the larger of the two Yardistry greenhouses that Costco sells and not the one you see on the showroom floor. It was out of stock so long I was afraid they had decided not to continue selling it but it finally showed up on the website and I hit the buy button immediately. They had to ship it from Atlanta GA to Greenville SC then up to me in Asheville. As for the size, that is pne reason I held out for the larger of the two—it is about 50% bigger—something around 75 sq ft instead of 50 sq ft. I have started to downsize my trees and now am trying to keep new ones under 12”. The downside is in order to get them that small I have resorted to air layering which means more trees even if they are smaller.
 
This one is the larger of the two Yardistry greenhouses that Costco sells and not the one you see on the showroom floor.

whoa... I didn't even realize that! nice
 
So after 3 1/2 weeks I now have four walls standing on their own! About half that time was in involved in digging foundation trenches, installing 4”x4” base and getting them leveled and squared, and installing tie down anchors. And hauling in about a ton of gravel was also a part of that along with a couple dozen cement pavers. The actual construction hasn’t been all that bad, just driving in a bunch of screws. The instructions are very good and every piece of lumber is numbered and keyed to each step. Now that the walls are up and connected it’s time to move on to the roof. Unfortunately we are about to get several days of wet weather so I figure I‘ll just move into the garage to prebuild the variois sub-sections and prepare all the polycarbonate window material. I’m hoping to have it all done but the shelving in about another week. Here are some photos.

I located it behind my wife’s pottery shed since it already has electricity that I can tap into. Plus I won’t have that far to carry the bonsai pots she makes me.

IMG_5923.jpeg

The greenhouse is 8’ tall at the peak and 6’ on the sides so plenty of overhead room.

IMG_5924.jpeg

I have another dozen pavers to make this 3 wide and 8 deep. The pea gravel should give good drainage.

IMG_5929.jpeg

Final interior dimensions are 7’3”x9’3” and the “glass” is 6mm thick double layer polycarbonate to give better insulation. The lower 32” walls are 1 1/2” thick Eastern white cedar so should also provide pretty good r value compared to glass.

IMG_5925.jpeg
 
And now 1 month after the kit arrived it is ready for action. Well, I still need to install the shelves but it is under roof, has a door and roof vents that open and close, and is for the most part weather tight. The project took 4 weeks mainly because of the installation of the foundation and the down time due to rain—I think it rained 6 of the last 7 days here. The kit was about as easy to put together as I expected and I would recommend it to anyone with basic carpentry skills and tools. Having watched their video showing the construction process helped a lot too. My only nits are the cheapness of the automatic vent openers, the rest of the hardware was heavy duty and works well. Also the kit is not made in Canada out of Eastern white cedar as I had thought but instead is made in China and seems to be distributed worldwide by Costco. It is made of Cunninghamia lanceolata a member of the cypress family which is used extensively in China for construction as well as to make coffins. It has a nice aromatic scent and is rot and insect (termite) resistant. Anyway here are some photos of the “finished” product.

IMG_0071.jpeg
IMG_0072.jpegIMG_0073.jpegIMG_0074.jpeg
 
Looks great! I love the fact that the polycarbonates slide in the wood frames instead of nailed on top of it...Now only if they make it in bigger size it would be perfect for my need. Thanks for sharing!
 
Looks great! I love the fact that the polycarbonates slide in the wood frames instead of nailed on top of it...Now only if they make it in bigger size it would be perfect for my need. Thanks for sharing!
Check your local building code. In my county any outbuildings with a side over 12’ requires a building permit, inspections, etc. At 8’x9.7’ this one didn’t require anything. All I had to do was stay 7’ from the fence line. I imagine DC would have more restrictive requirements just to get a permit fee out of you.
 
Real nice. is that the vent low to the ground? Or are there peak vents?
 
The one down low is to allow air to come in near ground level and then rise and leave via the ridge vents (2 of them 15”x42” each). If you look straight up from the low vent you can see the ridge vent. The ridge vents open automatically using those wax filled cylinders that start to open at about 60 degrees. It really is a well thought out design overall. They even included 5 tubes of silicone sealant to go around all the windows and a auto door closer like those used with storm doors.
 
Ok, one more day and it is essentially done. Today I got all the remaining windows caulked with silicone sealant, and I installed all the shelves. The place looks downright civilized. Next I will be looking for a fan and a heater but that is not something I really need until the fall. With respect to the benches there are 2 sets—the one up high is a 8” wide with variable overhead. The main bench is L shaped, 19” deep, 7’ long on the back wall and 9’ long on the right side. These have 32” clearance overhead and 19” under the shelves. The left wall has no shelves so I can keep my really tall trees there although most of those can take the cold so will likely still spend the winters outside. I’ll have updates from time to time as I get it ready for winter and see how it holds up. For now here are a couple photos of the shelves.

Here’s the long shelf'on the right wall and a bit of the upper shelf.
IMG_0075.jpeg

And here is a shot showing the shelf on the back wall and a better view of the upper shelves.

IMG_0076.jpeg
 
Really nice man ! What kind heat are you thinking ?
 
Back
Top Bottom