Collected Garden Rhododendron

DonielDoom

Mame
Messages
156
Reaction score
491
Location
Portland, OR, USA
USDA Zone
8b
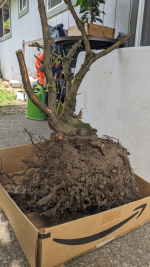
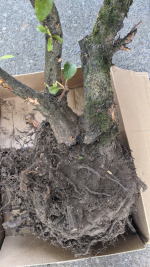
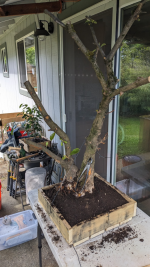
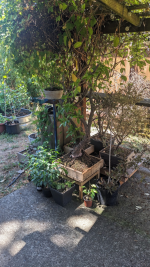
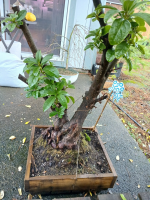
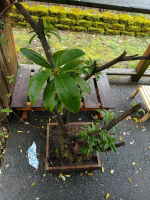
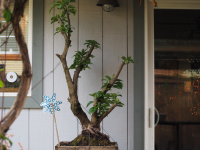
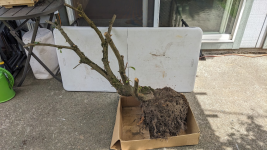
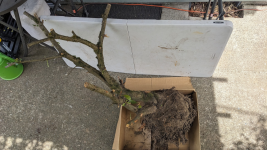
I obtained this Rhododendron in May of 2024. It was pulled from a garden by the homeowner and listed free online. I jumped at the opportunity for some low-stakes practice. I'm trying to gain experience where possible and this seemed like it'd provide a good outlet. I do not expect this material to become a beautiful traditional bonsai, however, I do see some beauty in it's form.

Overall, though, the value in this is in the experience for me. There's something about getting your hands dirty and making mistakes that goes a long way for me.

I value any advice and insight provided. Comments and criticisms are welcome.


My hopes are to work through two things this year to achieve a goal of building health:
1- Repot into appropriate substrate (kunama 80-90% and pumice 10-20% with a moss top covering) and adjust the dimensions of the grow box (deeper by a couple/few inches but likely around the same length/width). I'll be trying to time this action with the swelling of buds and general signs that spring growth is underway. Likely, a full rootwash and removal of old media is in order (I'm still reading up on best practice for my situation).
2 - Cut back the major stumps from the original pruning done prior to my care and seal them properly. This may have the added bonus of improving the silhouette/base design, but the focus is on health. I think I will wait to do this until after I observe and work the roots. Healthy roots seem to be the priority, and I don't want to impede that through pruning/grinding/etc. It very well could be that I just need to get the root system in order this year and let it grow without insults.

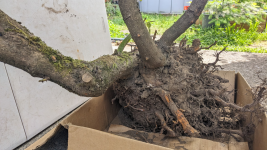
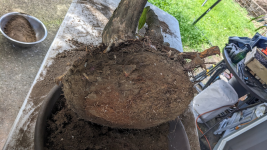
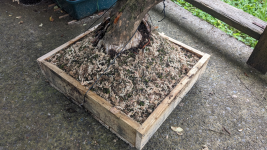
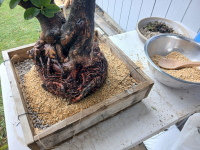
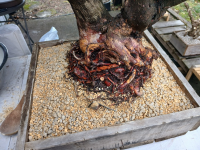
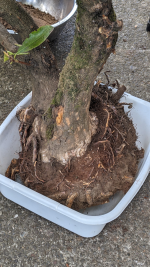
I'll come back around and post some recent photos for better bearing. Below are photos from collection and initial potting in the end of May 2024, except the last, which is from mid-June 2024. The substrate used was very fine and organic; not great.
1742132808714.png
1742133718428.png
1742133875068.png1742133913339.png1742133938026.png

Chopped off the bottom of the root base with a saw.
1742133984490.png1742134004782.png
1742134024797.png1742134055045.png1742134079916.png1742134107803.png1742134182646.png

Rough chopped sphagnum moss mixed with collected live moss. (I've since chopped all future mixes much finer)
1742134196161.png1742134218979.png

June 14 2024
1742134273185.png
 

Attachments

  • 1742134150531.png
    1742134150531.png
    1.3 MB · Views: 6
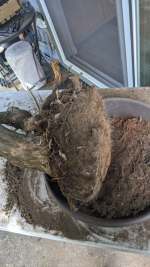
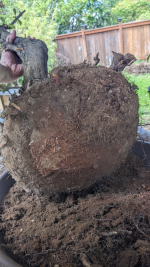
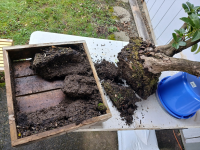
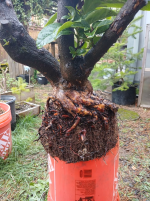
Yesterday I attempted to change out the soil and anchor this down a bit more effectively. I spent at least 1.5-2 hours trying to wash and remove the old compacted garden soil. It took much more than expected and I had to compromise on desired-results in the end. I was unable to completely wash the old soil from the compacted ball. It felt like picking at a rock. My tub wasn't large enough to effectively swish and work the roots submerged. The shower and jet setting on my garden hose, at various pressures, had to do. Being unable to work the mass free, I'm a bit unsure of how to handle my next steps. It is still very much a rock of old soil and roots, though I was able to remove enough substrate to observe some living roots.

I may simply need to work on this in multiple repots and adjust my expectation of a clean wash in one swoop. I also had thoughts of simply sawing off or removing the lower part of the root mass, since it doesn't seem like I'm going to be able to untangle it and organize easily. Not sure what would be more problematic for the tree, my hacking and removal of that core root mass, or, leaving things as-is. Tough call for my experience and knowledge.

It was placed into a mix of ~70% kanuma/~30% pumice. Had I done my preparations better, I'd have realized I didn't have enough kanuma to complete this operation. Thus a heavier blend of pumice than desired. The nasty substrate I used initially is a great example of what won't work. There were zero roots in that mass.

My goals here revolve around practice work on collected trees, repotting non-nursery-stock, observing conditions and building health. Especially that of larger trees, like this one that's at least 3-4' tall.

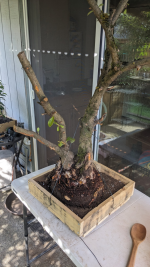
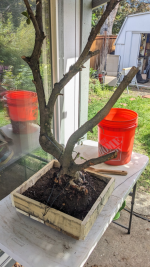
I need to decide whether to leave the repot, or to put it into deeper a container (like my gut says I should have) today/tomorrow. It seems too high in the pot, for one, and the pot seems too shallow for a Rhododendron (which I've read prefer some root depth and room), for two. A deeper box, by ~2", of the same dimension would be my solution.

If I were to take corrective action, I'd add more kanuma to my mix for something closer to 80%/20%, and essentially bury the root mass up another ~2" in a new box. Lastly, I'd add a slightly thicker moss covering. I'll update as decisions are made. The more I look at these pictures, the louder that planting depth screams at me...

I would love any insight, advice, and/or dialogue on this project. Thanks in advance!

Before repotting:
1743172449558.png
1743172500131.png
1743172522811.png
1743172544310.png

Poor soil, no roots. Shocker, I know.
1743173284083.png

After ~15-30 minutes of washing and (gently) picking with the chopstick. It was around this point when I started to realize I was in over my head and would likely be unable to fully separate and wash the roots. I trudged forward, patience front of mind.
1743173436826.png1743173815305.png1743173835300.png

Over an hour of washing, picking and trying to swish... It looks the same!
1743174216706.png
1743174247991.png
 
Moving forward with repotting, without losing the thought of "I should be putting this in something deeper".

1743174783120.png
1743174815692.png
1743174834463.png

Topcoat of chopped sphagnum moss mixed with chopped garden moss. It's not as heavy/thick as I believe it should be. I'll likely come back to add a thicker layer.
1743174861927.png
1743174885074.png

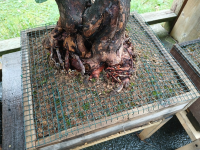
Wire mesh to cover the surface and hopefully annoy the squirrels. They ravage everything. They teach me patience through challenge.
1743174902270.png
1743174919974.png
 
Moving forward with repotting, without losing the thought of "I should be putting this in something deeper".

View attachment 589241
View attachment 589242
View attachment 589243

Topcoat of chopped sphagnum moss mixed with chopped garden moss. It's not as heavy/thick as I believe it should be. I'll likely come back to add a thicker layer.
View attachment 589244
View attachment 589246

Wire mesh to cover the surface and hopefully annoy the squirrels. They ravage everything. They teach me patience through challenge.
View attachment 589247
View attachment 589248
Can you just add another tier of boards on top of the box walls to make it deeper?
 
Can you just add another tier of boards on top of the box walls to make it deeper?
I second this! You need another full tier at least. Just add it on, and fill it up with good soil. With any luck the well aerated media closer to the natural nebari will induce fine roots up higher that you can work with.

Hadn't thought of that. Great idea. I'll add a tier today.

Feels like a no-brainer when y'all suggest it. I appreciate the guidance!
 
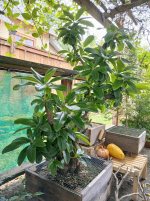
We'll see what happens. I'll add a thicker moss covering soon and let it be. The original box material is long gone, hence the slightly different dimensions of the lumber. I'm grateful for the kick to do it and the plan worked out smoothly.

Finished
1743207798118.png

Box prepped and staged. I only put the top screw into the corner pegs. This left it easier to wiggle into place and assemble.
1743207466258.png

Since I just filled this in yesterday it was easy enough to scoop out the corners for the corner pegs
1743207494398.png

Extension in place. The corner pegs were left ~1/2 short. This made it easy to secure without needing to be precise.
1743207511284.png1743207529383.png1743207552156.png1743207574499.png1743207591052.png1743207605808.png1743207628225.png1743207642466.png
 
Back
Top Bottom