KillerButts
Mame
I wanted to share the process I have found success with after seeing there is a demand for something with steady results.
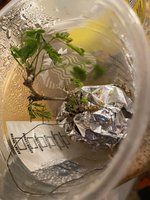
Below is a photo and list of everything one might need. I am going to go step by step for beginners so anyone new to BRT should be able to pull off this off.

Sharp branch cutters, wire cutter, wire, sphagnum moss, cloneX, one 10”x10” piece of Saran wrap and tin foil, gloves, a fine mister (no tap water), a flat unfinished clay pot tray (very important), a cloche or a large mason jar, a nail or drill bit just smaller than your intended cutting, use screws for cuttings above 3/4”.
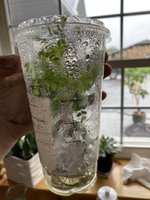
Your first step before starting is to mist the intended cutting while it’s still on the tree. Do not let it dry from this point till you are finished. Lay out your supplies so they ready for you.
Begin by soaking a large handful of sphagnum in a tray/bowl/strainer with water (no tap). Make sure to remove any sturdy or sharp twigs and break it up to ensure no dry patches. After roughly 15 minutes turn the tray to its side to drain, do not squeeze.
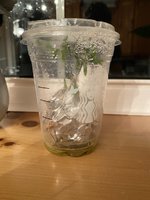
Next gather the moss and roll it in your hand but try not to squeeze. Once you have a decent ball shape place it on the Saran Wrap and roll it tight both ways into about a golf ball size. Then place it on the tin foil and repeat. Try to make a firm ball but don’t overly squeeze, you want saturation. The moss should not have the consistency of a air layer it should be saturated.


 Now take the nail/bit/screw you have selected and depress it roughly an inch and leave it.
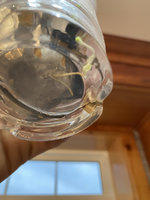
Next you want to prepare a small amount of cloneX and make sure everything is right in reach. When you make this cut the branch should be wet, you should immediately dip it into the cloneX and then give it a good roll on its side about an inch high.

Sorry I must break the post due to photo limit so please allow me to finish this in a second post.
Below is a photo and list of everything one might need. I am going to go step by step for beginners so anyone new to BRT should be able to pull off this off.
Sharp branch cutters, wire cutter, wire, sphagnum moss, cloneX, one 10”x10” piece of Saran wrap and tin foil, gloves, a fine mister (no tap water), a flat unfinished clay pot tray (very important), a cloche or a large mason jar, a nail or drill bit just smaller than your intended cutting, use screws for cuttings above 3/4”.
Your first step before starting is to mist the intended cutting while it’s still on the tree. Do not let it dry from this point till you are finished. Lay out your supplies so they ready for you.
Begin by soaking a large handful of sphagnum in a tray/bowl/strainer with water (no tap). Make sure to remove any sturdy or sharp twigs and break it up to ensure no dry patches. After roughly 15 minutes turn the tray to its side to drain, do not squeeze.
Next gather the moss and roll it in your hand but try not to squeeze. Once you have a decent ball shape place it on the Saran Wrap and roll it tight both ways into about a golf ball size. Then place it on the tin foil and repeat. Try to make a firm ball but don’t overly squeeze, you want saturation. The moss should not have the consistency of a air layer it should be saturated.
Now take the nail/bit/screw you have selected and depress it roughly an inch and leave it. Next you want to prepare a small amount of cloneX and make sure everything is right in reach. When you make this cut the branch should be wet, you should immediately dip it into the cloneX and then give it a good roll on its side about an inch high.
Sorry I must break the post due to photo limit so please allow me to finish this in a second post.