Deep Sea Diver
Imperial Masterpiece
Here’s an example of a bunch of a small neagari project, using five different cultivars. Be aware there are a number of similar techniques to create neagari, but all yield the same end product. This technique was illustrated in a Satsuki Kenkyo magizing back in the day.
We selected small 2-3 yoa plants. However have seen this.
Rootwashed and tied off the raffia for initial nebari shaping.

Raffia done - plant roots are soaking in water, waiting for planting.

Basic prepping of “pots” - (note a simple sheet of plastic stapled together on three sides will also do the job.
Chopped tops off

Drainage holes drilled

Potting up - layer caked. Large kanuma on the bottom, followed by medium and finally small kanuma to stabilize and cover the root zone.

Each azalea was stabilized with a bamboo skewer, then rinsed, soaked 3-4x until all dust was removed from the pot.

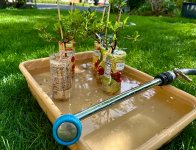
After last rinse all pots were left in the water, awaiting a new home to hold the pots stable. A couple quick cuts with scrap cedar fencing followed by drill and screws and their new home is complete!

Shown on the self watering bench. However one should note, after root washing this late in the potting season the plants should not be in the sun. Thus these are actually positioned under a bench where they get filtered sun for a couple weeks. They will be moved to a couple hours early morning sun followed by to open shade afterwards.
The azaleas will be kept in these containers, slremoving small amounts of the sides being removed for a couple years. Afterwards the roots will be inspected and roots wires if possible.
Cheers
DSD sends
We selected small 2-3 yoa plants. However have seen this.
Rootwashed and tied off the raffia for initial nebari shaping.

Raffia done - plant roots are soaking in water, waiting for planting.

Basic prepping of “pots” - (note a simple sheet of plastic stapled together on three sides will also do the job.
Chopped tops off

Drainage holes drilled

Potting up - layer caked. Large kanuma on the bottom, followed by medium and finally small kanuma to stabilize and cover the root zone.

Each azalea was stabilized with a bamboo skewer, then rinsed, soaked 3-4x until all dust was removed from the pot.

After last rinse all pots were left in the water, awaiting a new home to hold the pots stable. A couple quick cuts with scrap cedar fencing followed by drill and screws and their new home is complete!

Shown on the self watering bench. However one should note, after root washing this late in the potting season the plants should not be in the sun. Thus these are actually positioned under a bench where they get filtered sun for a couple weeks. They will be moved to a couple hours early morning sun followed by to open shade afterwards.
The azaleas will be kept in these containers, slremoving small amounts of the sides being removed for a couple years. Afterwards the roots will be inspected and roots wires if possible.
Cheers
DSD sends
